How to Use a DICOM Viewer: A Practical Step-by-Step Guide for Medical Professionals and Learners
1/29/2026
The Power Behind Medical Images
In modern medicine, images do more than show anatomy — they provide answers. X-rays, CT scans, MRIs, and ultrasounds contain critical diagnostic information. This data is stored in a special format called DICOM (Digital Imaging and Communications in Medicine).
A DICOM viewer is the tool that unlocks this information. Knowing how to use it correctly is no longer optional. It is essential for accuracy, confidence, and speed in clinical decision-making.
This guide explains how to use a DICOM viewer step by step. It is written for beginners, students, and medical professionals who want practical skills and expert tips.
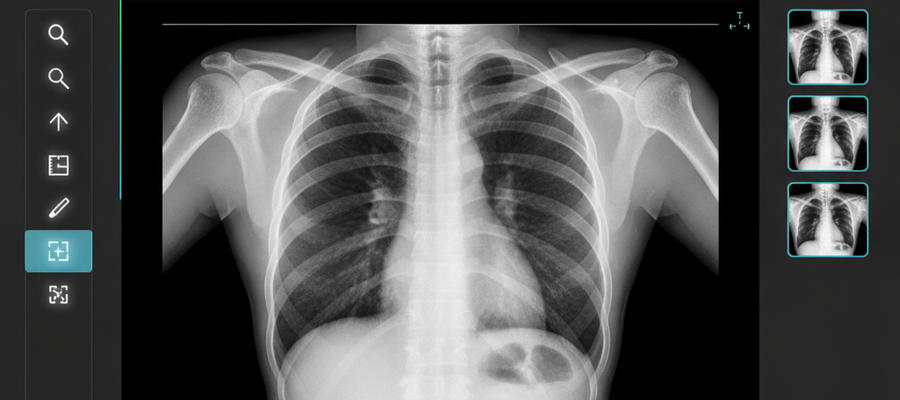
What Is a DICOM Viewer and Why Does It Matter?
A DICOM viewer is software that allows you to open, view, analyze, and manipulate medical images stored in the DICOM format.
Why DICOM Viewers Are Essential
DICOM viewers:
- Preserve image quality and medical metadata
- Allow precise measurements
- Support multi-slice and 3D visualization
- Enable standardized communication between systems
Powerful truth: A diagnosis is only as good as the image quality and the skill of the person interpreting it.
Step 1: Choose the Right DICOM Viewer
Before working with images, you need the right software.
Common Types of DICOM Viewers
- Desktop viewers: RadiAnt, OsiriX, Horos
- Web-based viewers: OHIF, Orthanc
- Hospital PACS systems: Enterprise-level platforms
What to Look For
Choose a viewer with:
- A clear and simple interface
- Fast loading for large studies
- Measurement and annotation tools
- Multiplanar reconstruction (MPR)
- Compatibility with your operating system
Start with a lightweight viewer before moving to complex PACS systems.
Step 2: Load and Organize DICOM Files
After installing the viewer, the next step is importing images.
How to Load DICOM Files
You can usually:
- Import from a CD or USB
- Open a DICOM folder
- Drag and drop files into the viewer
DICOM images are stored as studies, not single pictures. One study may contain hundreds of slices.
Best Practices for Organization
- Use clear folder names (patient, date, modality)
- Keep studies separated
- Never rename individual DICOM files
Do not compress or modify original DICOM files. Metadata integrity is critical.
Step 3: Navigate Through Image Slices
Once images are loaded, they appear as stacked slices.
Basic Navigation Tools
- Scroll wheel: Move through slices
- Zoom: Examine details
- Pan: Reposition the image
- Reset view: Return to default orientation
Standard Viewing Planes
- Axial: Top to bottom
- Sagittal: Side view
- Coronal: Front view
Always confirm orientation before interpretation. Orientation errors lead to diagnostic mistakes.
Step 4: Adjust Window Level and Window Width
Windowing is one of the most powerful features of a DICOM viewer.
What Is Windowing?
- Window Level (WL): Controls brightness
- Window Width (WW): Controls contrast
Different tissues require different settings:
- Bone window
- Lung window
- Soft tissue window
Learn keyboard shortcuts for window presets. They save time and improve consistency.
Step 5: Measure and Annotate Images
Measurement tools are essential for diagnosis and follow-up.
Common Measurement Tools
- Distance
- Angle
- Area and ROI
- Pixel values (e.g., Hounsfield Units in CT)
- Text annotations
When Measurements Matter
- Tumor size tracking
- Fracture evaluation
- Organ enlargement
- Surgical planning
What you don’t measure, you can’t monitor.What you can’t monitor, you can’t manage.
Step 6: Learn Advanced DICOM Viewer Features
As you gain confidence, explore advanced tools.
Important Advanced Functions
- Multiplanar reconstruction (MPR)
- 3D rendering
- Image fusion
- Series comparison
- Cine mode for dynamic studies
Master MPR early. It dramatically improves spatial and anatomical understanding.
Step 7: Review Metadata and Patient Information
Every DICOM file contains important hidden data.
Metadata Includes
- Patient ID and age
- Study date and time
- Imaging modality
- Slice thickness
- Scan parameters
Always follow patient privacy and data protection regulations.
Step 8: Export and Share Images Safely
DICOM viewers allow secure image export for reports and consultations.
Common Export Formats
- JPEG or PNG (presentations)
- PDF reports
- DICOM files (referrals)
Never share identifiable images without proper authorization.
Common Beginner Mistakes to Avoid
- Ignoring orientation markers
- Using incorrect window settings
- Over-zooming and losing context
- Reviewing only one slice
- Skipping metadata review
A DICOM viewer is a diagnostic instrument, not a photo gallery.
Final Thoughts: Skill Turns Software Into Insight
Learning to use a DICOM viewer is not about clicking buttons. It is about training your eye to recognize clinically meaningful details.
With practice:
- Images become stories
- Slices become structures
- Data becomes diagnosis
A skilled professional with a well-used DICOM viewer doesn’t just see images — they see answers.

